Create a new mission folder
To create a new mission you start by creating a new folder containing all the necessary files for it.
Mission Assets
The following assets are needed for a working mission. You can either create them from scratch or use our Sample Mission as a Quick Start.
String Table is where all your player facing text is found.
Data Asset contains information from the mission and connects the player facing text from the string table with the blueprint logic.
Mission Blueprint controls the logic of your mission.
String Table
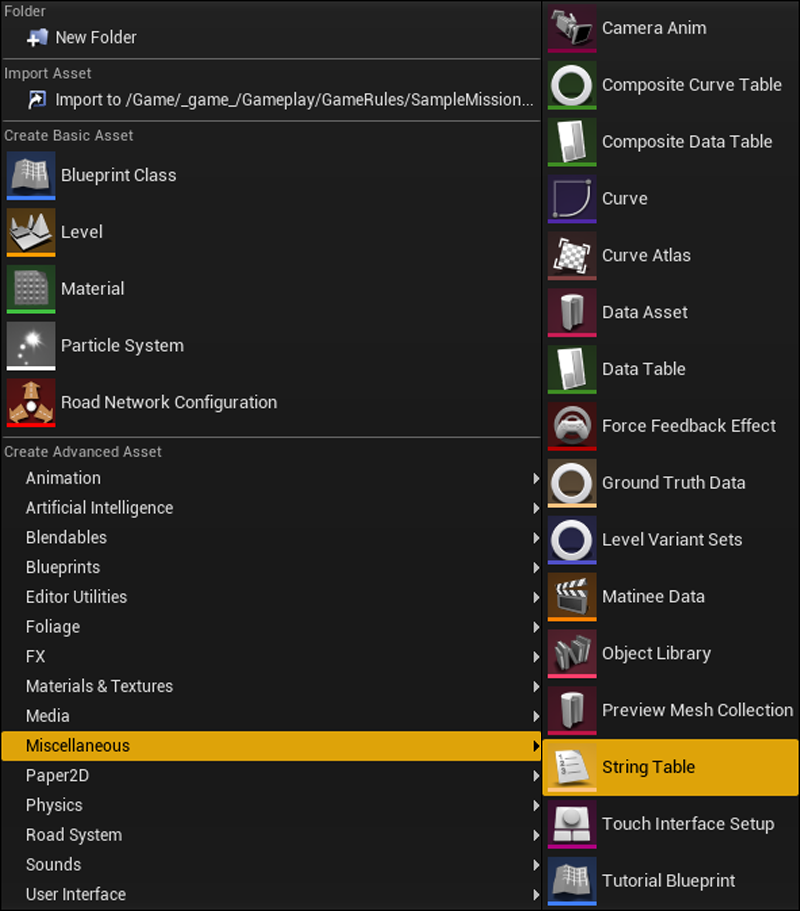
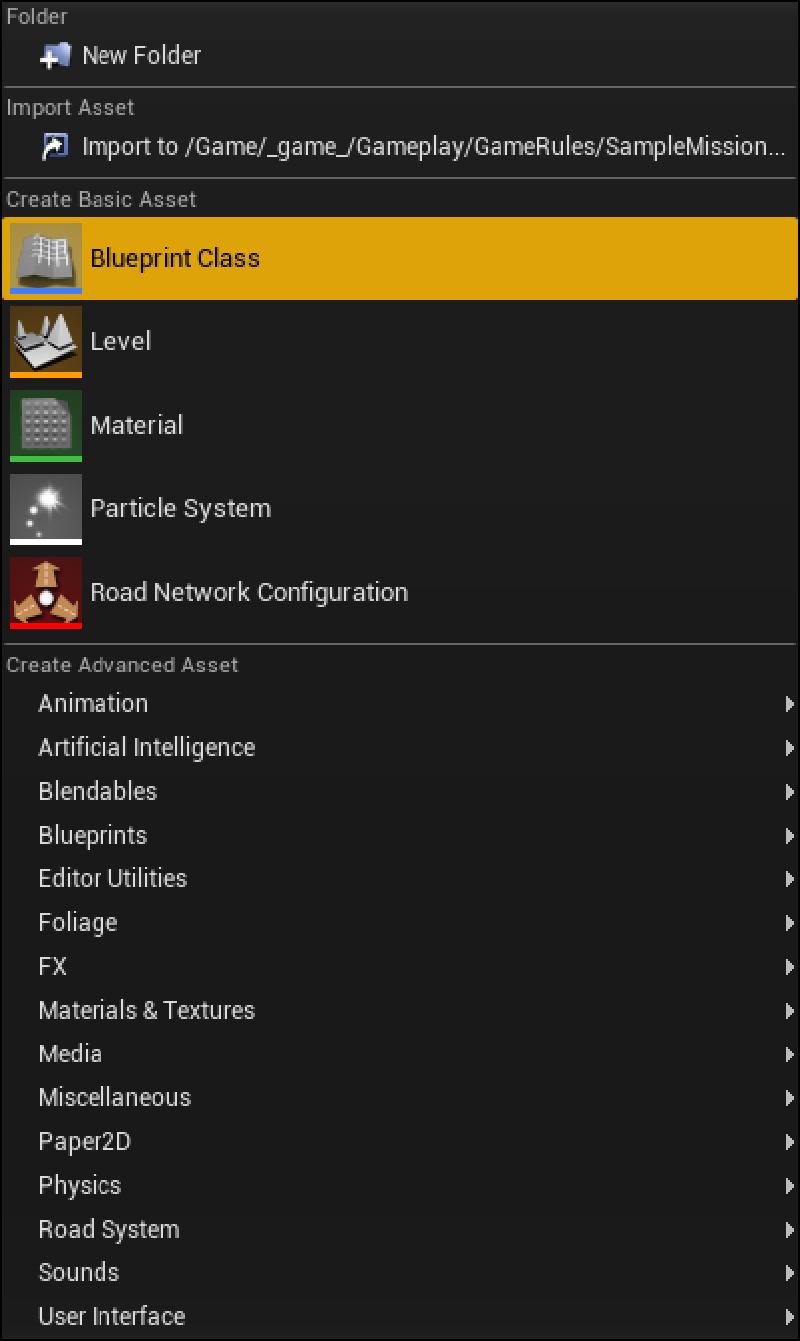
Right-Click in the Editor to create a new String Table.
(They can be found under the “Miscellaneous” category.)
Open the newly created String Table to add new text.
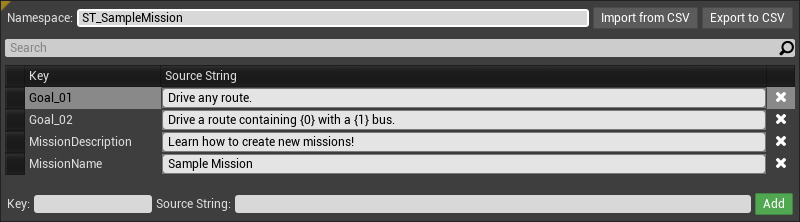
To add new text create a Key and a Source String then click Add.
Usually we use the following texts:
MissionName is the title of your mission
MissionDescription is a short description or subtitle of your mission
Goal_## are individual sub goals.
Note that numbers in { } brackets indicate replacement text handled in the blueprint.
Data Asset
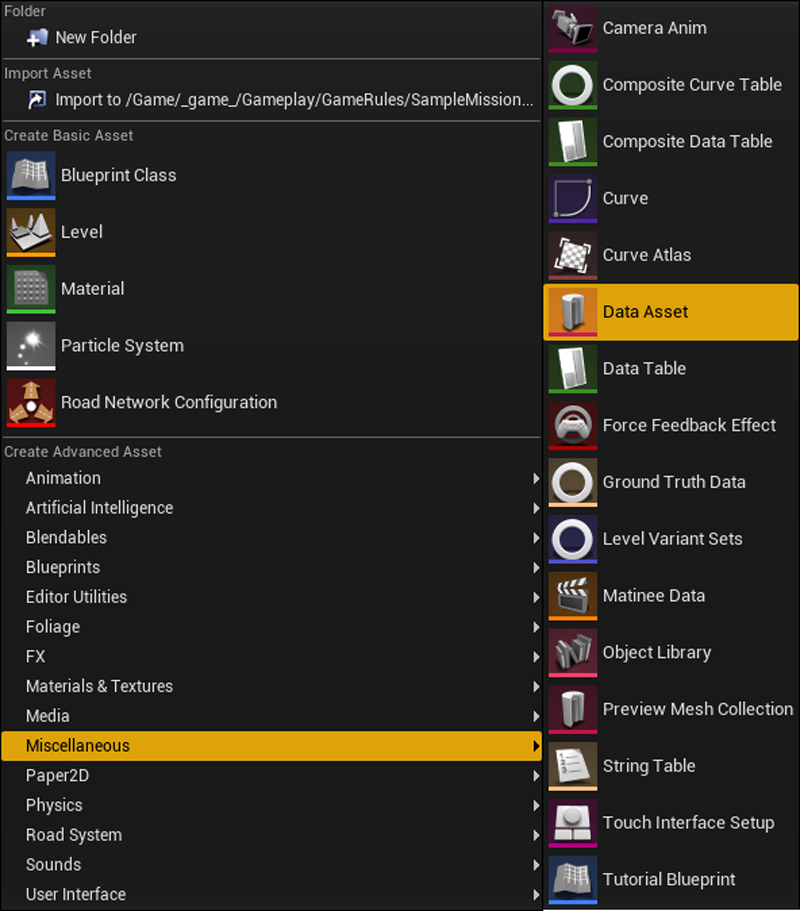
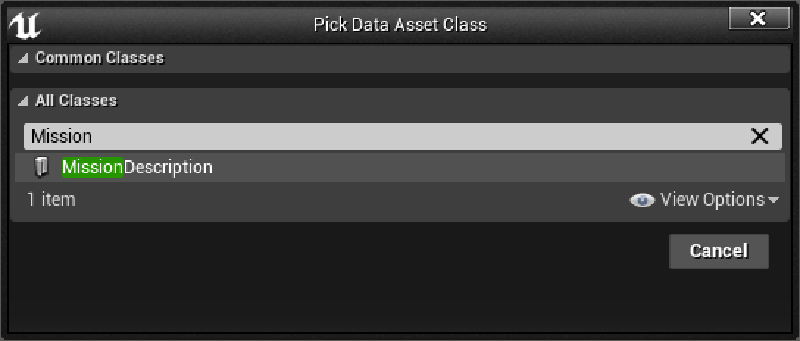
Create a Data Asset and select “Mission Description” as Class.
Open the new Data Asset.
To set the Mission Title and Description search for your corresponding string table and the correct key.
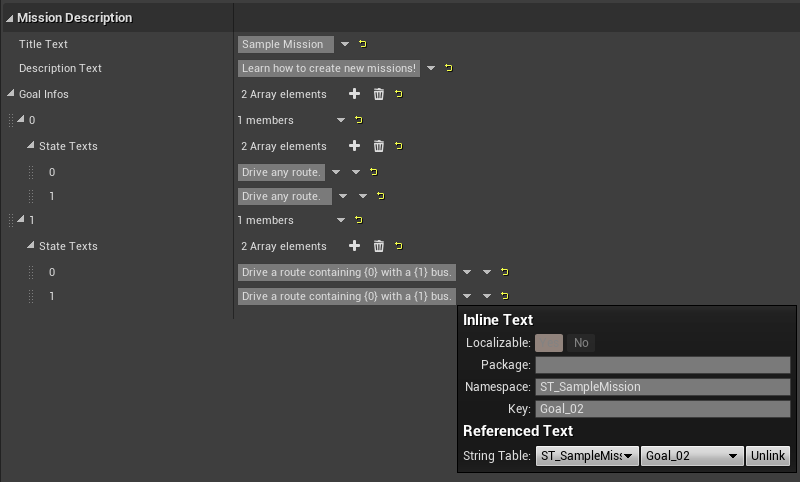
Then add a new Goal Info entry for every subgoal you have and add the subgoal text.
You may ask why we need the subgoal text twice in the Data Asset.
The answer is that when you finish a mission the subgoal text gets crossed out, to do this a second entry with the same text is used.
Mission Blueprint
Create a new Blueprint Class and then select the “Mission” Blueprint as its Parent Actor.
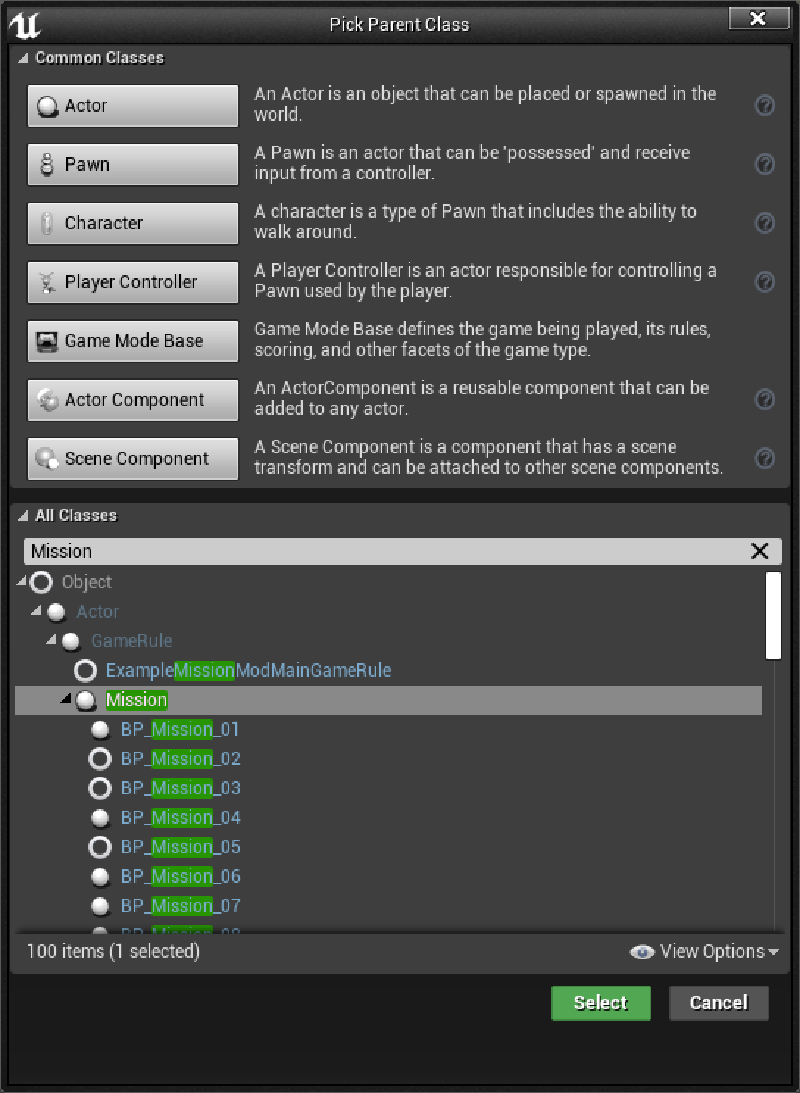
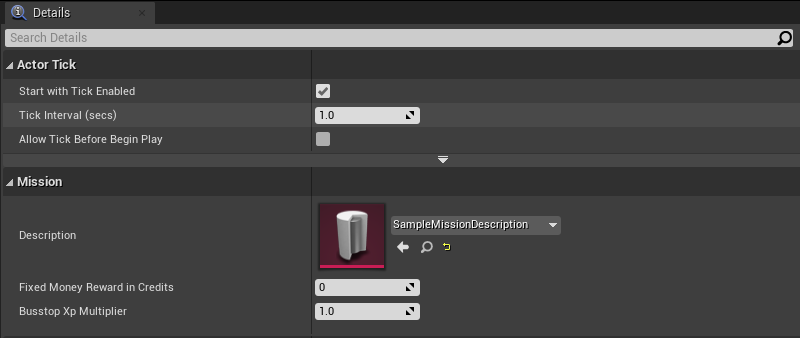
Open the newly created Blueprint and add your Data Asset to the Mission Description.
Blueprint
All our missions are created using blueprint, a type of visual coding language, used in the Unreal Engine. To create your own missions blueprint knowledge is necessary. This is not a blueprint tutorial, however we will highlight some useful nodes to make it easier for you to get started.
Useful nodes:
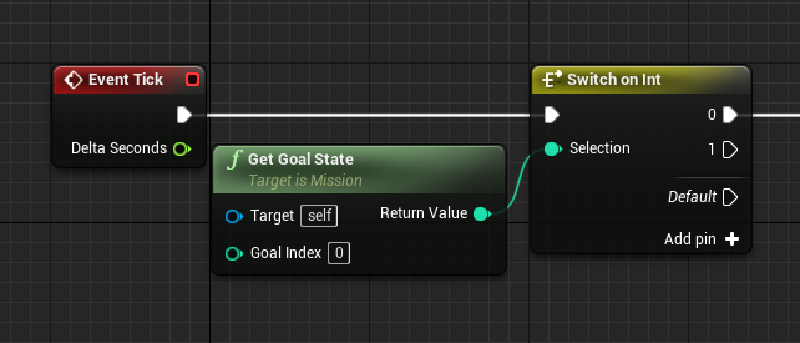
Get Goal State - Returns the goal state (0 = Not Completed / 1 = Completed) from a subgoal. (You can find the correct Subgoal-Index in the Data Asset)
Switch on Int - Checks a value (in this example the state of Goal Index 0) and then executes based on the value.
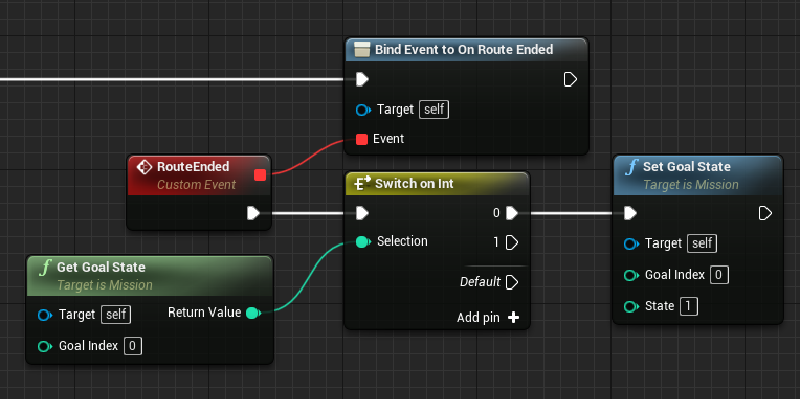
Set Goal State - Sets the goal state to a certain value (usually 1 for completing the subgoal). In this example we set the goal state of the index 0 to 1 after completing a route and checking that the state index 0 is 0.
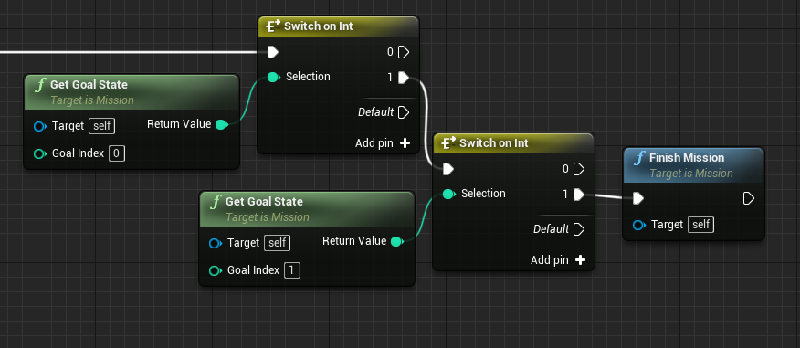
Finish Mission - Finishes the Mission and loads the next one in the progression sequence. (In this example we check for both subgoals to be completed, then finish the mission)
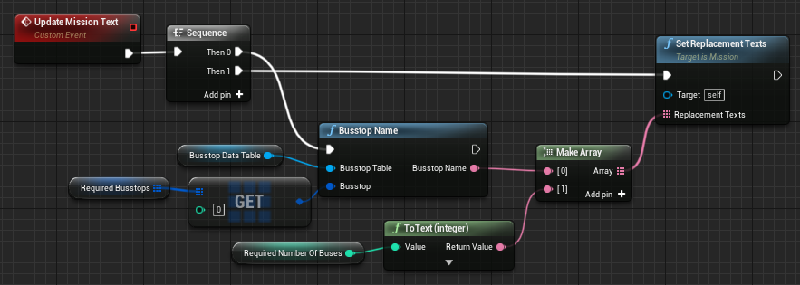
Set Replacement Text - Replaces text in { } Brackets in the String Table with variables transformed into strings. In this example we replace {0} with the required Busstop and {1} with the required number of Buses.
Mission Helper
The MissionHelper is a blueprint library filled with functions designed to create subgoals more easily. You can chain simple functions together to create more complicated subgoals.
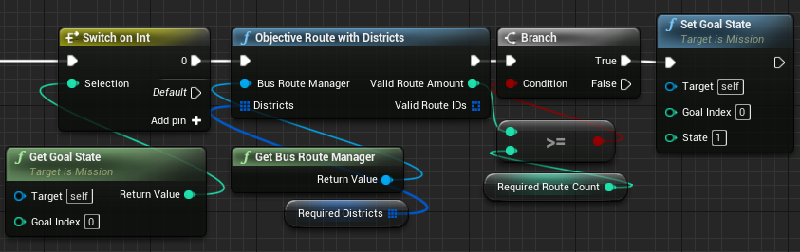
In this example we call the Objective Route with Districts function that checks how many routes currently exist with the Required District. Then we compare this number against our Required Route Count and set the Goal State of Index 0 to 1.
Add your new mission to the mission progression
To make your mission a part of the game progression you need to make a new entry at the Progression blueprint. The Progression manages the order in which missions are played.

Press + to add a new entry. You can then find this new entry at the bottom of the list.

Then select the Blueprint of your mission.
Here, for example, we now have our Sample Mission at position 38.
Add unlocks to your mission
To add unlocks of any kind to your mission a new entry at the correct UnlockingRewardsDataAsset is necessary.

Press + to add a new entry. You can then find this new entry at the bottom of the list.

This is you new entry. First you need to select the type of unlock you want to have. You can choose between:
Bus
Busstop
District
Decal
Ad
Wrap
Color

In this case I decide to bind the unlocking of the Scania Citywide 14,8m to our Sample Mission.
Bus Model is the name the of the bus referred in the Modinfo.
Unlock Condition is the Mission Blueprint you want to bind the unlock to.
Unlockable Name is the name that the player sees when the unlock pop up appears.
Hidden in UI is rarely used to hide the unlock pop up.
On this page: |